A leaking crawler excavator can lose digging force before the operator notices a serious problem. Oil may appear as a thin amber line beneath a hose, around a boom cylinder, or inside the track frame. Learning how to troubleshoot hydraulic leaks on a crawler excavator requires more than tightening every visible fitting. It requires a controlled inspection, accurate identification, and respect for stored hydraulic pressure.
Hydraulic systems specialist Brendan Casey has repeatedly emphasized the danger of contamination, stating, “Contamination is the enemy of hydraulic systems.” That principle matters during leak repairs. A dirty rag, loose cap, or exposed hose end can introduce particles into valves and pumps. Small contamination. Expensive consequences.
Begin with the machine parked on firm ground, the attachment lowered, and hydraulic pressure released according to the manufacturer’s procedure. Never search for a pinhole leak with bare hands. Use cardboard or wood instead. Check the hose cover for abrasion, swollen sections, and fresh oil tracks. Inspect cylinder rods for scoring, pitting, and oil collecting behind the wiper seal. Examine fittings after cleaning the area, because old oil can create a misleading trail.
A pressure gauge can confirm whether the suspected circuit behaves normally. However, pressure testing without the correct service data may produce a false conclusion. I have seen technicians replace a cylinder seal when a loose return-line connection caused the leak. That mistake wastes time and leaves the real fault untouched. Reliable troubleshooting combines field experience, the excavator’s service manual, clean work practices, and careful reinspection after repair.
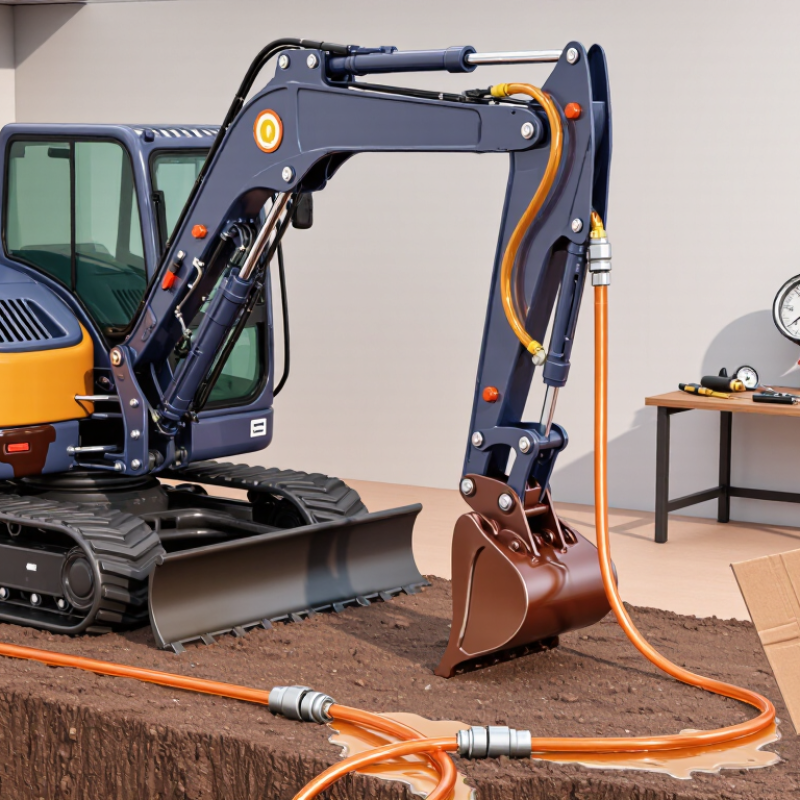
Hydraulic excavator leaks rarely appear where the failure begins. Oil may travel along a hose, frame, or valve block before dripping. Start with a clean machine and a safe inspection area. Lower the attachment, stop the engine, and release stored hydraulic pressure. Never search for a pinhole leak with bare hands. Use cardboard or a suitable detection tool instead.
Leak behavior often reveals its source. A steady drip near a fitting may indicate a loose connection or damaged seal. A fine spray under pressure suggests a cracked hose or weakened tube. Oil around a cylinder rod can point to worn rod seals, but dirt may create a false clue. Wipe the area, run the system briefly, and inspect again. Keep your face and fingers away from pressurized components.
Record the oil color, smell, location, and timing. A leak that appears only during boom movement needs a different test than one appearing during idle. Check hose abrasion points, couplers, valve joints, cylinder glands, and the tank return line. I have misread oil trails before, especially on warm frames. That mistake costs time. Recheck the highest wet point, not only the lowest drip. Replace damaged seals or hoses with correctly rated parts, then verify pressure and movement through a controlled inspection.
Before troubleshooting a hydraulic excavator leak, make the worksite safe. Park on firm, level ground, lower the boom and bucket, and stop the engine. Block attachments that could move unexpectedly. Hydraulic systems can retain pressure after shutdown. ISO 4413 requires stored energy to be safely released before maintenance. Apply lockout and tagout procedures, then cycle the controls with the engine off. Confirm zero pressure using the machine’s gauge. Do not trust silence.
Wear eye protection, gloves, safety footwear, and suitable protective clothing. OSHA guidance warns that hydraulic injection injuries can occur at pressures near 100 psi. A fine oil jet may pierce skin without causing immediate pain. Never search for a leak with your hand. Use cardboard or wood instead. Clean the area, inspect from a safe distance, and check hoses, fittings, cylinders, and seals for abrasion, cracks, or wetness. One loose fitting can spray oil across a hot engine surface.
The practical mistake is rushing after finding the leak. A technician may tighten a fitting before pressure is fully relieved. That shortcut can cause serious injury and hide a damaged hose. Replace questionable components with correctly rated parts, not temporary clamps. If the source remains unclear, stop work and involve a qualified hydraulic specialist. The leak may be smaller than expected, but the stored energy is not.
| Inspection Dimension | Typical Observation | Likely Cause | Safe Inspection Method | Recommended Corrective Action | Priority |
|---|---|---|---|---|---|
| Safety preparation | Hydraulic components are hot, pressurized, or moving unexpectedly. | Engine shutdown alone may not remove stored hydraulic energy. |
|
Do not begin disassembly until the machine is immobilized, the hydraulic pressure is relieved, and the operator manual confirms the system is safe to inspect. | Critical |
| Visible fluid spray or mist | Fine spray, mist, or a high-pressure jet appears near a hose, fitting, or valve. | Damaged hose, loose connection, cracked tube, or failed seal under pressure. | Never use hands to locate a leak. Keep clear of the suspected area and use a piece of cardboard or wood from a safe distance only after pressure has been isolated. | Shut down and depressurize the system. Replace the damaged hose or component. Seek immediate medical attention for any suspected injection injury, even if the wound looks small. | Critical |
| Hose outer-cover damage | Abrasion, cuts, exposed reinforcement wires, blistering, flattening, or oil-wet sections are visible. | Rubbing against structure, excessive bending, heat, aging, or improper routing. | Inspect only when the hose is depressurized and cool. Check the full hose length, including bends and clamp locations. | Replace a hose with exposed reinforcement, blistering, severe abrasion, or other structural damage. Correct routing and secure the hose against further contact. | High |
| Loose threaded fitting | Oil collects around a threaded joint or fitting, sometimes with a visible wet track. | Insufficient tightening, vibration, damaged threads, or an incorrect sealing method. | Clean the area after depressurization, then inspect the fitting and mating threads for damage. Do not tighten a live hydraulic connection. | Replace damaged parts and tighten the connection to the manufacturer's specified torque. Use only the seal or thread treatment approved for that connection type. | High |
| O-ring or face-seal leakage | Fluid appears around a flange, face seal, adapter, or cartridge valve. | Cut, flattened, hardened, contaminated, incorrectly sized, or improperly installed seal. | After isolation, separate the joint carefully and inspect the seal groove and sealing surfaces for scratches, dirt, or deformation. | Install a clean, correctly sized replacement seal. Lubricate and position it as specified, then tighten the joint to the specified torque. | High |
| Cylinder rod leakage | Hydraulic oil forms a ring around the piston rod or runs down the cylinder barrel. | Worn rod seal, damaged or corroded rod, contaminated oil, or excessive side loading. | Lower the attachment, isolate the system, and inspect the exposed rod for scoring, rust, dents, or contamination. Do not touch the rod while the system may move. | Repair or reseal the cylinder if permitted by the service procedure. Replace or restore a damaged rod and correct any alignment or side-loading problem. | High |
| Valve block or manifold leakage | Oil appears around a valve body, plug, spool cover, or manifold connection. | Failed seal, loose plug, damaged mating surface, or a cracked component. | Clean the area and inspect after the machine is isolated. Confirm the exact source because oil can travel along the housing. | Replace the failed seal or damaged component. Tighten plugs and connections according to the service specification; do not apply excessive force. | High |
| Pump or motor case leakage | Oil is present around the pump or motor housing, shaft seal, or drain line. | Worn shaft seal, excessive case pressure, damaged housing, or a restricted case-drain line. | Inspect externally after shutdown and pressure release. Check the case-drain routing and condition only as directed by the service manual. | Repair or replace the affected seal or unit. Investigate case pressure and drain restrictions before returning the excavator to service. | High |
| Oil level dropping without an obvious leak | The reservoir level falls repeatedly, but no external wet spot is visible. | Small seepage, oil retained in the attachment, internal leakage, or fluid loss into another compartment. | Check the reservoir using the manufacturer's level procedure and inspect hidden hose runs, guards, the undercarriage, and attachment cylinders. | Identify and repair the source. Do not keep operating while repeatedly adding fluid, because low oil can cause aeration and hydraulic component damage. | High |
| Foamy or milky hydraulic oil | Oil appears aerated, cloudy, or unusually light in color; the pump may become noisy. | Low reservoir level, air entering the suction line, water contamination, or unsuitable fluid. | Stop operation if abnormal noise or erratic movement occurs. Inspect the reservoir level, suction hose, breather, and filler area after the system is safe. | Repair air ingress, remove contaminated fluid when required, replace filters if specified, and refill with the correct hydraulic fluid. | High |
| Leak at the reservoir or return line | Oil is found around the tank, drain plug, return filter head, or low-pressure return hose. | Damaged gasket, loose drain plug, cracked tank, blocked filter, or deteriorated return hose. | Confirm the tank is stable and the oil is cool. Inspect the joint and surrounding area only after pressure is released. | Replace the gasket, plug, hose, filter head, or tank as required. Clean spilled oil promptly to prevent slips and environmental contamination. | Routine but urgent |
| Leak after a component replacement | A new leak begins immediately after hose, fitting, filter, cylinder, or valve service. | Incorrect part, contaminated sealing surface, pinched seal, wrong orientation, or improper torque. | Stop the machine and repeat the isolation procedure. Compare the installed part and seal with the service information before reassembly. | Correct the installation, replace damaged seals, clean all mating surfaces, and pressure-test gradually while keeping personnel clear. | High |
| Post-repair verification | No visible leak is present immediately after repair. | The fault may reappear only at operating temperature or pressure. | Check fluid level, start and warm the machine according to the operator manual, and cycle the attachment slowly from a safe position. Reinspect for leaks without touching pressurized parts. | Stop immediately if leakage, abnormal noise, erratic movement, overheating, or pressure-related symptoms return. Record the repair and inspection result. | Required |
| Spill control and disposal | Hydraulic oil has contaminated the ground, platform, or machine surfaces. | Leakage was not contained or absorbent material was unavailable. | Keep ignition sources away, restrict access to slippery areas, and use suitable absorbent materials. Prevent oil from entering drains or soil. | Collect used absorbent materials and waste oil in approved containers. Dispose of them according to applicable local environmental requirements. | Required |
China Top Hydraulic Excavator Leak Troubleshooting
Check Common Leak Points on a China Top Excavator
Hydraulic leaks usually appear where movement, heat, and vibration meet. Inspect the boom cylinder rod first. A thin oil ring around the rod can indicate a worn wiper or seal. Check hose ends, crimp collars, valve blocks, and pump connections with clean cardboard. Never use bare hands. A pinhole jet can penetrate skin.
I once blamed the main pump too quickly. That judgment was wrong. The loose fitting was hidden behind a dusty guard. Clean the area, run the excavator slowly, and mark the first wet point. Check return hoses under the engine cover, pilot lines near the control valve, and swivel-joint seals between the upper and lower frames. Fresh oil on the track may come from a final-drive seal, not the hydraulic circuit.
Contamination also matters. ISO 4406:2017 classifies particles at 4, 6, and 14 micrometres; one code step represents about twice the particle count. Dirty oil can damage valve spools and create leaks that look like seal failures. The ISO 4413 hydraulic-safety standard also emphasizes controlled leakage, hose security, and safe pressure release. Record the oil temperature, leak location, and operating hours before replacing parts. A pressure test may expose a weak hose, but testing cold can mislead you. Recheck after the machine reaches working temperature. Some leaks are missed because technicians inspect only during shutdown.
Hydraulic excavator leaks rarely have one obvious cause. Oil may drip from a hose, yet the real problem can be a damaged seal, loose fitting, or scored cylinder rod. During field inspections, I clean the area first and run the machine at low pressure. Fresh oil then reveals the active leak more accurately.
Repair or replace the damaged hydraulic component based on its condition, not guesswork. A hardened seal can often be replaced if the cylinder barrel and rod remain smooth. A cracked hose, distorted fitting, or deeply scratched rod usually requires replacement. Reusing a weakened part may create another leak within hours. That mistake is easy to make. I have seen clean repairs fail because contamination entered during assembly. Use lint-free materials, correct torque, and fresh hydraulic fluid. Follow the excavator’s service specifications and record pressure readings before changing major parts.
Tips: Wear eye protection and release stored hydraulic pressure before inspection. Never search for leaks with bare fingers; use cardboard instead. Check the reservoir level after repairs, then test every function slowly. If the oil turns milky, investigate possible water contamination. A small leak deserves attention, even when production still feels normal.
Hydraulic leaks often appear after the excavator warms up. Cold oil can hide a damaged hose, loose fitting, or worn cylinder seal. Park the machine on level ground, lower the attachment, shut down the engine, and release hydraulic pressure. Never search for a leak with bare hands. Use cardboard or wood to locate fine oil spray. High-pressure fluid can penetrate skin without leaving a large mark.
Clean the affected area before testing. Then run the excavator slowly and watch each joint, hose bend, valve block, and cylinder rod. Check the reservoir level, oil color, and filter condition. A pressure gauge can confirm whether the system reaches its specified working pressure. Do not tighten fittings while the circuit remains pressurized. Replace damaged hoses instead of wrapping them temporarily. Use correct seals and tighten connections according to service data, not guesswork. A small drip today may become a sudden failure tomorrow. Inspect clamps and abrasion points during every maintenance interval. Keep hoses away from sharp edges and excessive heat. Record the leak location and repair date. This record helps reveal repeated problems. I have seen clean repairs fail because the original vibration was ignored. That part deserves another look.
Test the excavator and prevent future hydraulic leaks by comparing circuit pressure with typical reference ranges.
Main hydraulic circuits commonly operate around 250–350 bar, pilot circuits around 30–40 bar, and case-drain pressure should typically remain below 5 bar. A pressure value outside the equipment service specification can indicate a leaking hose, seal, valve, pump, or excessive internal bypass. Always confirm the exact limits in the excavator service manual before testing.
Inspect the highest wet point, not only the lowest drip. Oil can travel along hoses, frames, or valve blocks. Clean the area, run the system briefly, and check again. I have misread warm oil trails before.
It may indicate a loose connection or damaged seal. Check the fitting, nearby hose, and sealing surfaces. Tighten connections only to the specified torque. Do not guess.
A fine spray under pressure may suggest a cracked hose or weakened tube. Stop the engine and release stored pressure before inspection. Never use bare fingers to find a pinhole leak. Use cardboard instead.
Oil around the cylinder rod can indicate worn rod seals. Dirt may create a false clue. Wipe the rod and gland with a lint-free cloth, then inspect after slow movement.
Replace cracked hoses, distorted fittings, and deeply scratched rods. A hardened seal may be replaced when the barrel and rod remain smooth. Reusing weak parts can cause another leak within hours.
Lower the attachment, stop the engine, and release stored hydraulic pressure. Wear eye protection and keep your face away from pressurized parts. Stay cautious.
A leak during boom movement needs different testing from a leak appearing at idle. Record the location, oil color, smell, and timing. This small record can expose a hidden pattern.
Use clean tools, lint-free materials, correct torque, and fresh hydraulic fluid. Check the reservoir level before testing. Move each function slowly and inspect again. The repair may still need review.
Troubleshooting a hydraulic excavator leak begins with identifying the leak type and locating its source. Fluid may escape as a drip, spray, seepage, or pressure-related burst, so inspect hoses, fittings, cylinders, valves, pumps, and the hydraulic tank carefully. Before checking the system, park the crawler excavator on stable ground, lower the attachment, shut down the engine, release stored hydraulic pressure, and wear suitable protective equipment. Never search for a high-pressure leak with bare hands.
How to troubleshoot hydraulic leaks on a crawler excavator? Start by cleaning the affected area and inspecting common leak points for cracked hoses, loose connections, worn seals, damaged tubes, or corrosion. Tighten fittings correctly and replace components that cannot be safely repaired. After maintenance, refill the system with the correct fluid, run the excavator at low speed, and check for renewed leakage while monitoring pressure and fluid levels. Regular inspections, proper hose routing, clean hydraulic fluid, and timely seal replacement can help prevent future leaks and reduce downtime.

Neto Forklifts